
Golf Interior LED Kit
This how to page shows you the steps to upgrading your VW Golf Mk5 or MK6 interior globes to hyper-white LED. This was one of our founding products with first iterations dating back to 2013 with countless updates over the years. You will notice that the factory globes are rather common - 8x T10/W5W wedge globes and three festoons, however, we have tailored LEDs for the best combined ambience.
How is this kit tailored?
-Radiant T10 LEDs for overhead dome lights. A true hyperwhite without any blue or purple harsh hues, brighter than stock but not over bearing.
-Hyperbright boot light housing - we want maximum brightness here as there is only a single boot light fixture from factory
-Hyperbright Footwell light housings - on the MK6 these can illuminate at night time when driving and the brightness can be adjusted via the MFD (steering wheel/dash controls). The high brightness can be reduced when driving and will automatically return to 100% when the doors are open (acting somewhat as a puddle light will light projecting out the door jam).
-Low output vanity mirror lights.
Intensity is critcial here! - a tailored low output festoon LED for a hyperwhite colour temperature update, but similar brightness to stock.
-High Intensity Glovebox LED housing
This is a utility application similar to the boot and can be hyper bright as it's not typically illuminated so we don't need to hold back!
TOOLS INCLUDED:
- T20 Torx
- Trim removal tool
LED CONFIGURATION:
- 2x Remnant LED Inbuilt footwell housing (Red, Blue or white)
- 1x Remnant LED inbuilt Glovebox housing (white)
- 2x Vanity mirror Festoon LEDs
- 5x Overhead wedge socket LEDs
- 1x Trunk Festoon LED
Step 1 - Front Dome Map Lights (X2)
- Locate the overhead map lights and pry trim panel down to reveal 2x T20 Torx fasteners.
- Remove 2X T20 Fasteners
- Pry down housing assembly
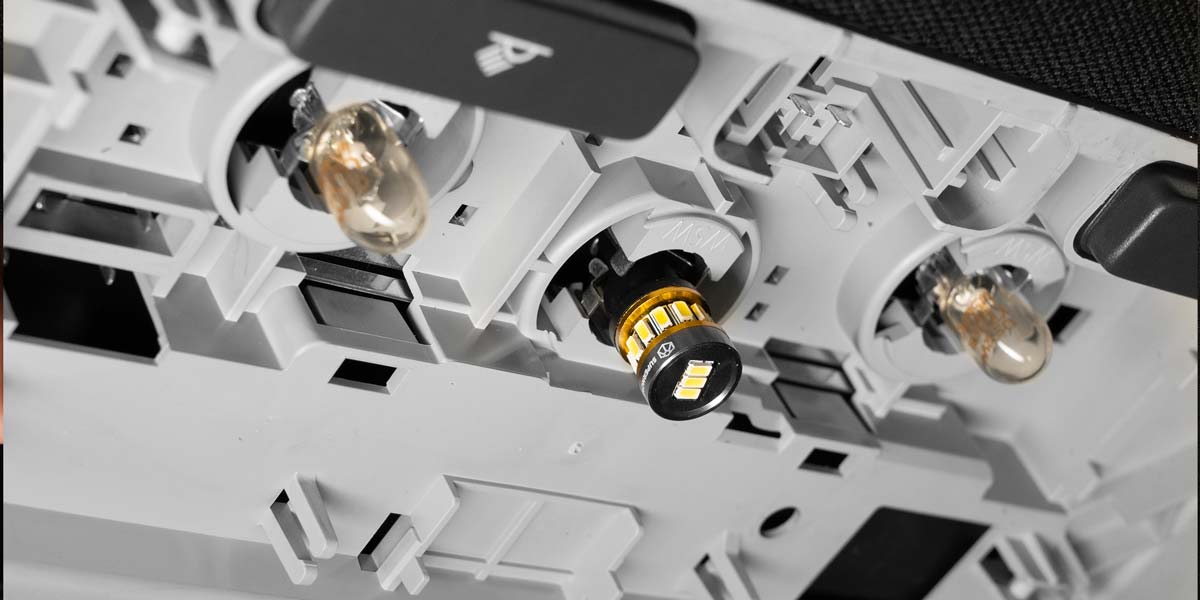
- Twist T10 globe sockets 45º anti clockwise, remove out of assembly. Remove globe and fit LED. Re-fit to assembly.


Step 2 - Vanity Mirror Lights (X2)
Pry housing down from side with indentation/notch. Remove halogen festoon and fit LED. Clip housing back into place.

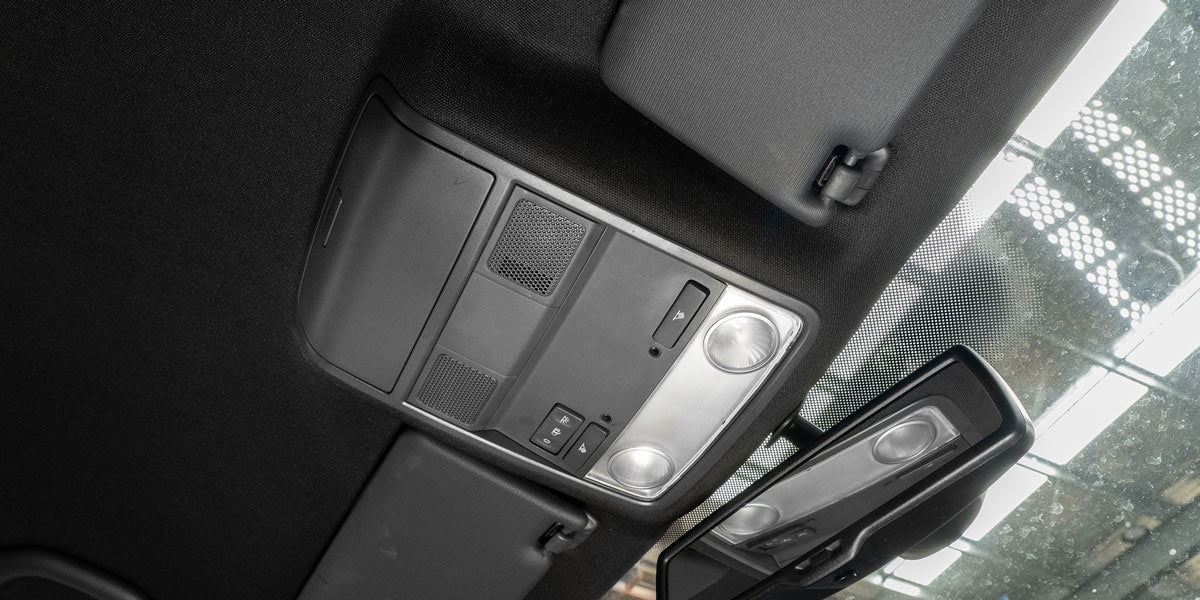
Step 3 - Rear Dome Lights (X3)
Pry down plastic trim to reveal three halogen globes.
Pull directly down on halogen globe to remove, insert LED.
Notes: If the LED does not illuminate, remove, rotate 180º and re-fit.
If LED is flickering or inconsistent. Remove LED, pry the holding metal contacts closer together for a better connection. The mechanical compression both holds the wedge LED into place and provides electrical continuity. A snug fit stays in place and gets full power. 
Step 4 - Footwell Lights, Glovebox and Bootlight Housing Replacements.
These are super easy as it's a housing replacement with inbuilt LED opposed to the earlier steps which were globe replacements.
Simply pry down the housing, unplug the electrical connector, plug in the new LED housing and clip back into place!

Troubleshooting
Overhead LEDs flicker over bumps/movement.
Solution: Loose fit. Remove LED and pry metal contacts closer together (ensure power is off to avoid short circuit).
No interior lights operate now!
Solution: The interior fuse has blown and requires replacing. Locate in drivers door jam - owners manual will specify location (varies per Golf based on options/year etc)
Find The Kit Here